
When deploying Surfshark VPN as Software Package using our Management Console, you will need to add the below configuration to ensure that Surfshark VPN runs normally when Process Security (v8) are enabled.
Please note that the below configuration does not apply to version 7.x.
Process Security for v8 OnPrem
Edit your desired TDA Profile
Go to Process Security > Right click on the blank space > Add
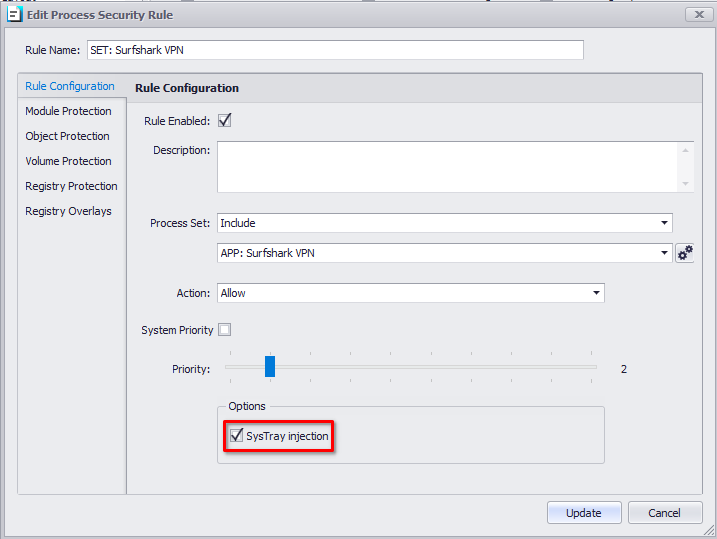
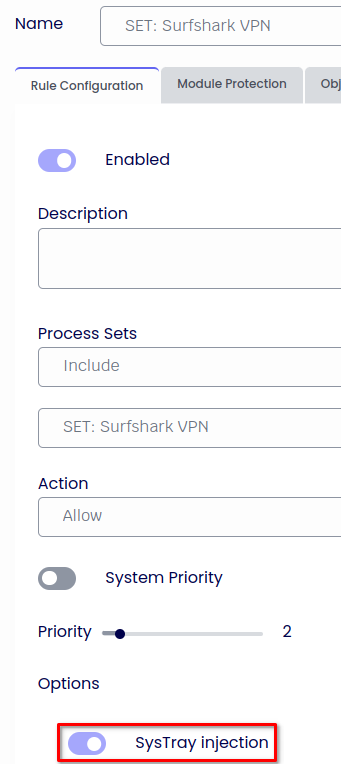
Rule Name: SET: Surfshark VPN
Select New Process Set:
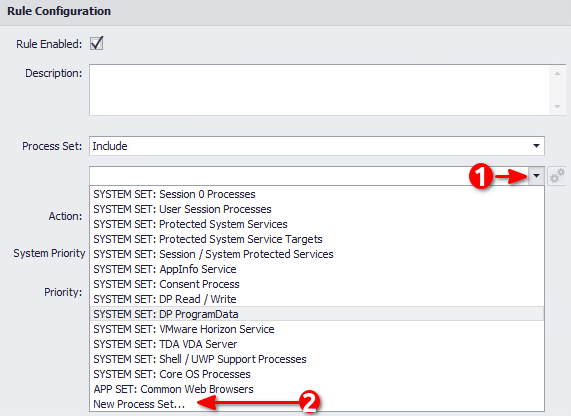
Set Name: SET: Surfshark VPN
Identity Rules > Right Click > Add New
Rule Name: IDENTITY: Surfshark VPN
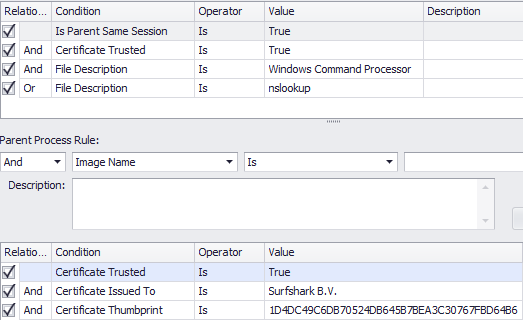
Is Parent Same Session Is: True
Certificate Trusted Is: True
AND Certificate Issued To Is: Surfshark B.V.
AND Certificate Thumbprint Is: 1D4DC49C6DB70524DB645B7BEA3C30767FBD64B6

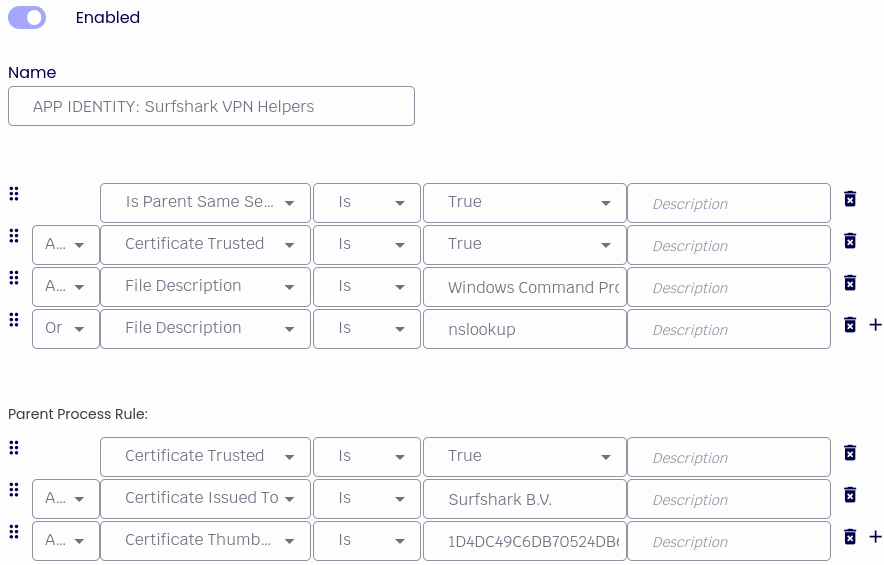
Rule Name: IDENTITY: Surfhsark VPN Helpers
Is Parent Same Session Is: True
AND Certificate Trusted Is: True
AND File Description Is: Windows Command Processor
OR File Description Is: nslookup
Parent Process Rule:
Certificate Trusted Is: True
AND Certificate Issued To Is: Surfshark B.V.
AND Certificate Thumbprint Is: 1D4DC49C6DB70524DB645B7BEA3C30767FBD64B6
Click on Update
Check that the option for SysTray injection is enabled:
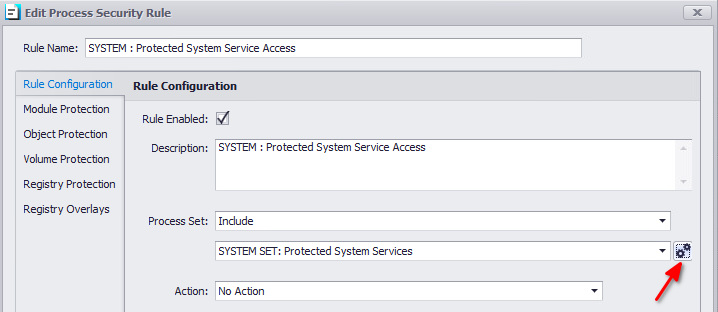
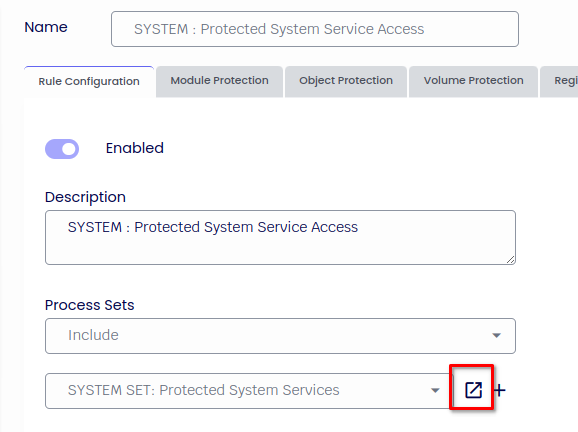
Edit SYSTEM: Protected System Service Access
Under Rule Configuration, click on the cog
Right Click > Add New
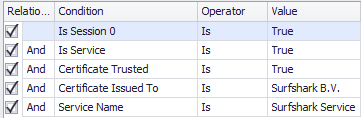
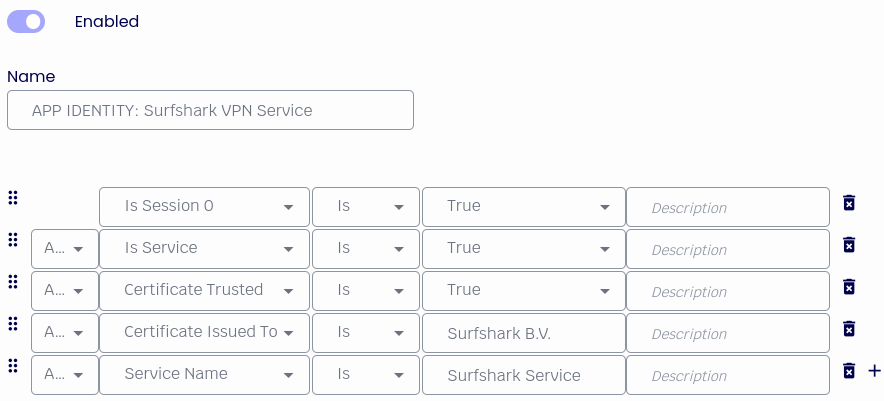
Rule Name: APP IDENTITY: Surfshark VPN Service
Is Session 0 Is: True
AND Is Service Is: True
AND Certificate Trusted Is: True
AND Certificate Issued To Is: Surfshark B.V.
AND Service Name Is: Surfshark Service
Click OK
Click Update
Under Service Protection
Set Session Start Group to Session Start Actions from the dropdown menu and then click on the cog

Right Click on the blank space and Add New
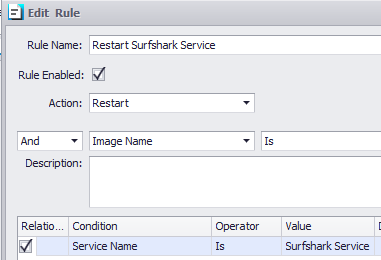
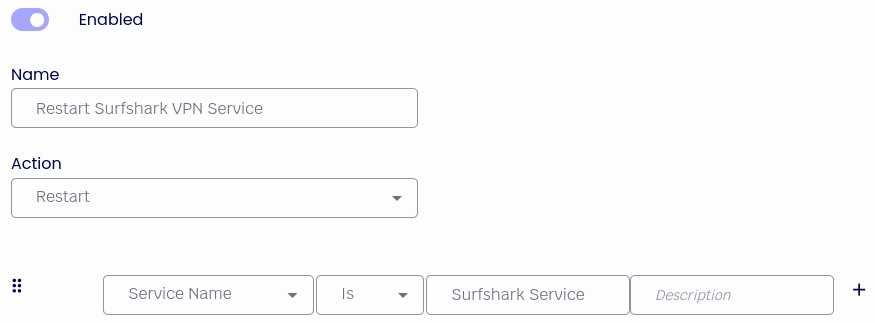
Rule Name: Restart Surfshark VPN Service
Rule Enabled: Checked
Action: Restart
Service Name Is: Surfshark Service
Click OK
Click Update
Save Profile
Process Security for v8 Cloud
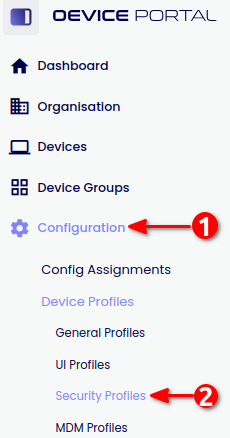
Login to your Device Portal
Navigate to Configuration > Security Profiles and open your desired Security Profile
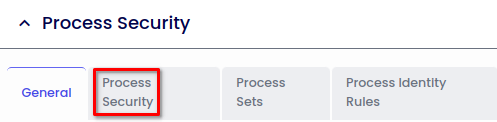
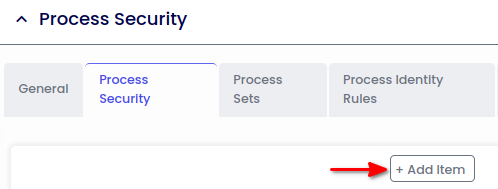
Go to Process Security and expand
Go to Process Security Tab
Click on + Add Item
On the right hand side
Type:
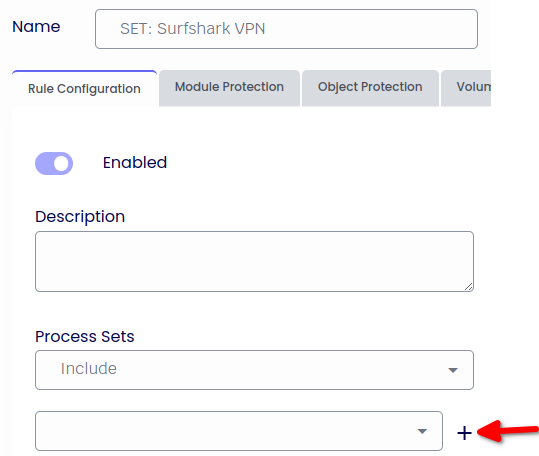
Name: SET: Surfshark VPN
Enabled: Checked
Click on the “+” button
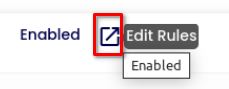
Click on Edit Rules:
Click on + Add Item
Enabled: Checked
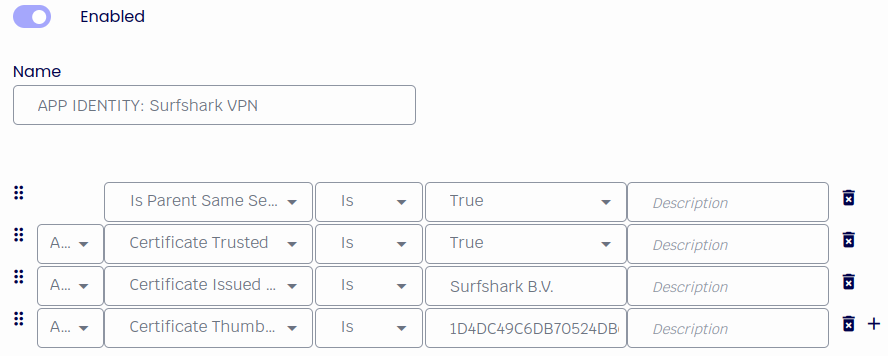
Name: APP IDENTITY: Surfshark VPN
Is Parent Same Session Is: True
AND Certificate Trusted Is: True
AND Certificate Issued To Is: Surfshark B.V.
AND Certificate Thumbprint Is: 1D4DC49C6DB70524DB645B7BEA3C30767FBD64B6
Click Apply
Click On + Add Item
Rule Name: APP IDENTITY: Surfshark VPN Helpers
Is Parent Same Session Is: True
AND Certificate Trusted Is: True
AND File Description Is: Windows Command Processor
OR File Description Is: nslookup
Parent Process Rule:
Certificate Trusted Is: True
AND Certificate Issued To Is: Surfshark B.V.
AND Certificate Thumbprint Is: 1D4DC49C6DB70524DB645B7BEA3C30767FBD64B6
Click Apply
Close popup window
Click Apply and Close the popup window.
From the Process Sets dropdown Menu select Include and the new set created
Enable: SysTray Injection
Click Apply
Edit: SYSTEM: Protected System Service Access
Click on Edit Rules:
Click on + Add Item
Rule Name: APP IDENTITY: Surfshark VPN Service
Is Session 0 Is: True
AND Is Service Is: True
AND Certificate Trusted Is: True
AND Certificate Issued To Is: Surfshark B.V.
AND Service Name Is: Surfshark Service
Click Apply
Close the popup window.
Click Apply
Go to Service Protection and expand it.
Under Session Start Group, edit Session Start Actions

Click on Edit Rules:
Click on + Add Item
Rule Enabled: Checked
Rule Name: Restart Surfshark Service
Action: Restart
Service Name Is: Surfshark Service
Click Apply
Close popup window
Save the configuration from the top right corner:
