Setting up Dual Persona for SRW
Setting up Dual Persona for SRW. #SRW-KB26
During the process of creating your Secure Remote Worker environment, you likely have seen the option for “Dual Persona” inside the profile editor. This is a powerful feature for any Secure Remote Worker deployment. This article describes how to set up and configure it
What is Dual Persona
The Dual Persona functionality provides full separation between the personal and secure working sessions. It creates an isolated and encrypted Windows user profile allowing applications to be installed onto the endpoint locally. This will stop the employee from accessing those apps on their personal device, as well as allow data to be saved within this virtual partition on the disk, preventing any attempt to leak data.
How to set up Dual Persona on your Secure Remote Worker-enabled devices
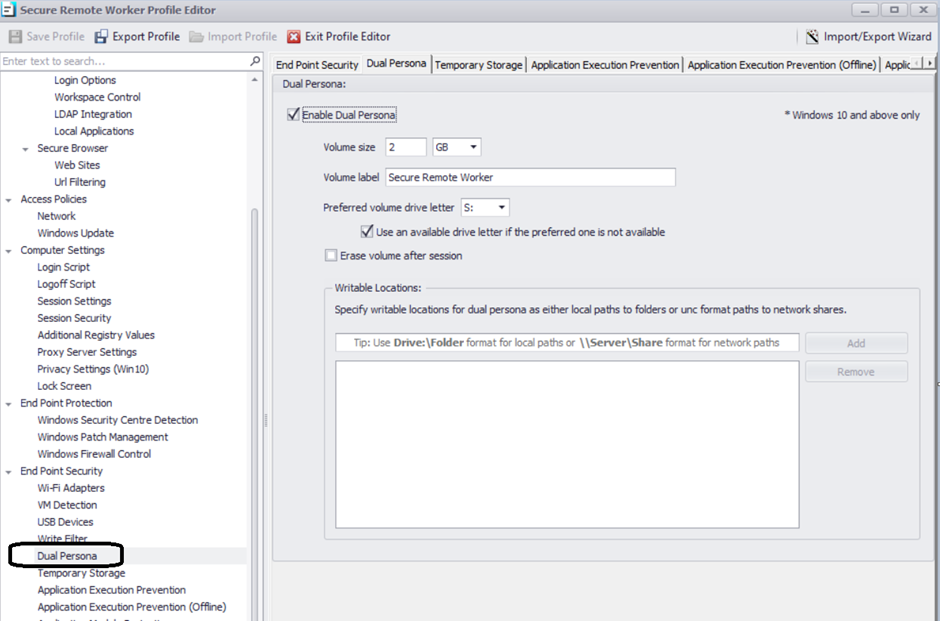
Dual Persona can be found in the Profile Editor for Secure Remote Worker (7.0 and above).
Enable Dual Persona
To enable Dual Persona, simply tick the box labelled “Enable Dual Persona”.
Volume size
You will then need to designate how much data you want to allocate to the virtual volume. Dual Persona is dynamically sized, so the allocation is an absolute maximum. If the data used is less than specified it will not consume any more than it needs (i.e. 2 GB is the max volume size set, but only 500 MB of data is used, then only 500 MB of space will be taken by the virtual volume.)

EXTREME CAUTION IS ADVISED when considering and calculating the MAXIMUM allocated drive size. Once set, and with the Dual Persona drive created on the endpoint, it cannot be resized without losing the contents of the drive, unless backed up manually. Further changes in the profile won't have any effect unless .vhdx files are located and deleted manually, using the local admin account, from the "C:\ProgramData\SRW" location.

Prior to that, the ThinScale administrator must ensure that the drives are not mounted, by assigning the profile with Dual Persona disabled. Once files have been deleted, the user has to perform a session reset: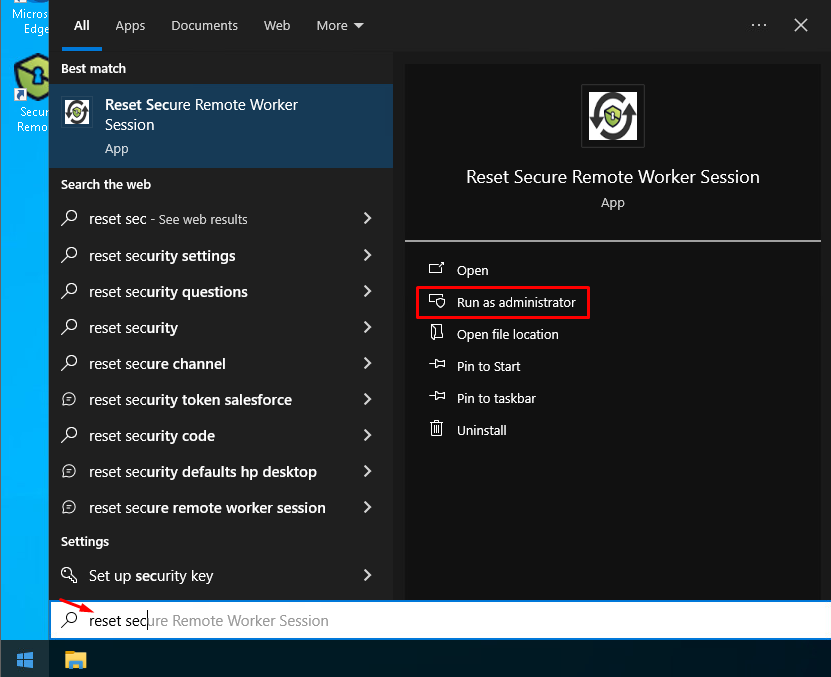
The profile with the new desired allocated volume size can now be applied, and a new virtual disk is created. That will also require re-install of any applications and per-user Software Packages you might have assigned to the folder.
***For WINDOWS HOME EDITION virtual drive creation please click HERE
Volume Label
You can specify the label of the volume here. It is recommended you do this in order to easily identify the Dual Persona volume at a later stage. In this case, we have named the volume “Secure Remote Worker”

Preferred Volume Drive Letter
This specifies the drive letter that the Dual Persona virtual volume will be assigned to. It is recommended to choose a drive that is not currently in use (C:, D:, etc.)
You can also tick the option below the preferred volume drive letter dropdown to allow Dual Persona to find any available drive letter for its volume if the specified preferred drive is unavailable.


Erase volume after session
With this feature, you can restore the SRW environment to a blank slate every time the user logs back in. Removing any data or applications saved to Dual Persona.

Although more secure, if the session is erased at every logoff, during the SRW login process the user logging in will be presented with the OOBE (Out of the Box Experience) every time.
Writable Location
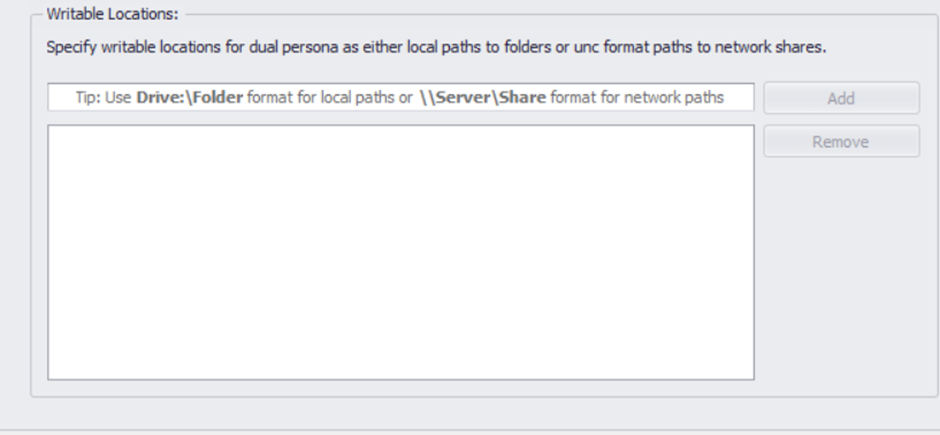
This feature allows IT to provide users with access to another location on a disk that they may require. This will allow employees to work within a secured, encrypted drive, while also allowing them to access resources from other locations. Particularly useful for deployments that rely heavily on Network Share drives.
Next Steps
Once you have made the changes to your Dual Persona settings, the first step is to hit “Save Profile.” This will save the changes to this profile and make them active on any devices to which this profile is assigned.

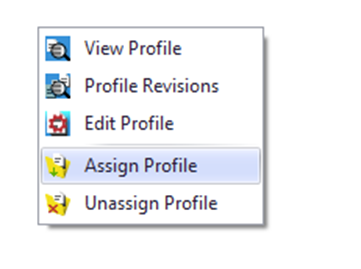
Next, all you have to do is assign the profile to the relevant device, to do this go to the device folder of the machines that you want to apply Dual Persona to. The easiest way is to simply click, the folder. Move over to the profile tab on the left select “Assign Profile” and select your recently updated profile.
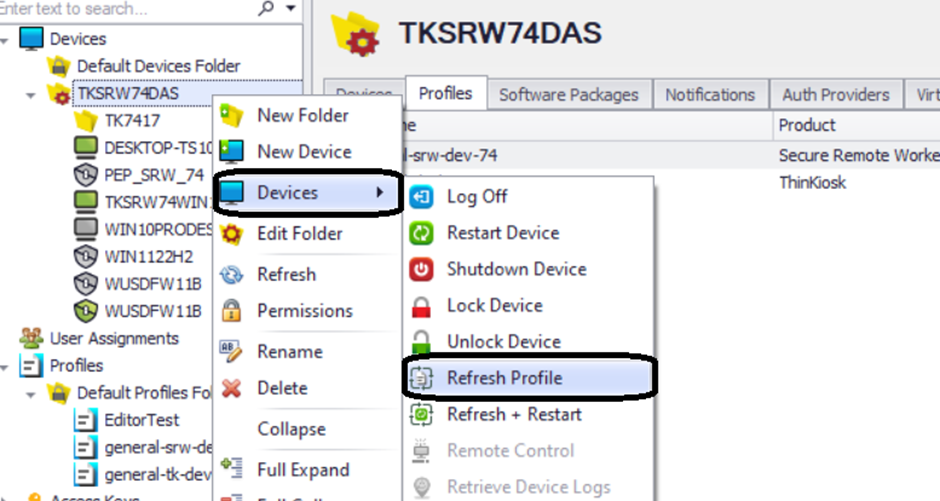
Finally, right-click on the device folder and hover over the Devices option. In the menu that appears click “Refresh Profile” and this will apply the new Dual Persona settings across all devices in the folder.
Important: If the profile is refreshed against a Device Folder it might cause data loss as it will force a restart of all the machines within that folder.
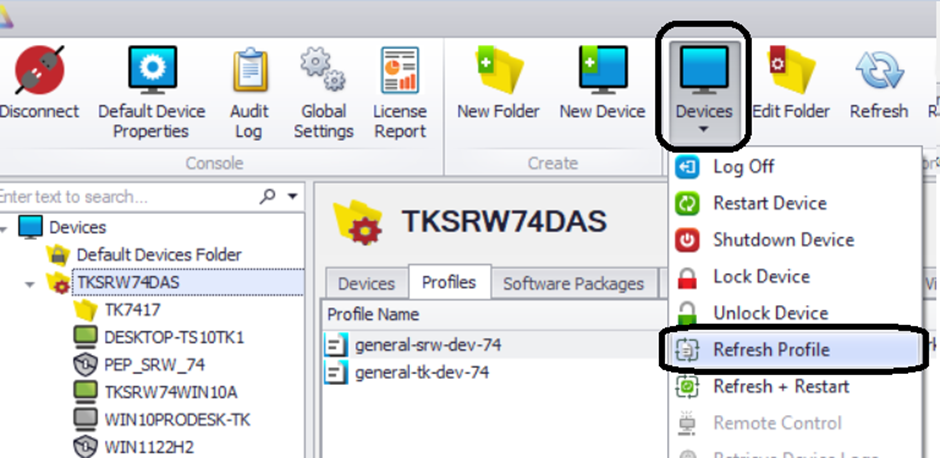
(Alternatively, you can just click the folder itself and navigate to the “Devices” option in the top ribbon. Clicking this dropdown will provide you with the same option to refresh your profile.)
You can of course also assign the profile through User-Base Profile Assignment, for more information on how, please refer to this guide. Simply assign your new Dual Persona-enabled profile the same way the “Sales” profile is assigned in the guide.
And that is it! Dual Persona is now enabled on your user’s devices.