Management Console Virtual Disks
Management Console Virtual Disks. #MC-KB17

Written by
Last published at: September 13th, 2024Virtual Disks
Virtual Disks are required by Home Edition Operating Systems when the Dual Persona or Temporary Storage features are enabled in your ThinKiosk or Secure Remote Worker profiles.
The same virtual disk can be assigned to multiple device folders, but a separate disk is required for Dual Persona and Temporary Storage if both technologies are enabled.
Create a new virtual disk, select a name, size, volume label, and optionally an encryption password.
Info
When setting the Temporary Storage or Dual Persona disk volume labels, please be sure to limit your label to 32 characters or less, as 32 characters is the maximum character limit that Windows allows. Please note this includes spaces. Otherwise you may encounter an error such as "Failed to enable Secure Remote Worker/Thinkiosk".
For v7 or v8 On-Prem (self-hosted) Deployments
Please follow the demonstration that performs the steps below to deploy a Virtual Disk needed for Temporary Storage:
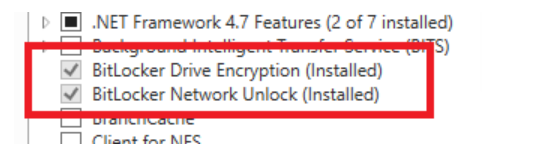
1. Before you start creating the Disk, make sure that your server has these two features enabled under Server Manager-->Add Roles and Features:
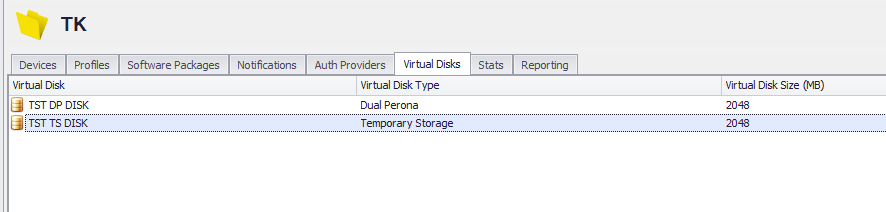
2. Create a Virtual Disk by right-clicking Virtual Disks in the Management Console and selecting "Create Virtual Disk"

Note: Volume Label must be less or equal to 32 characters.
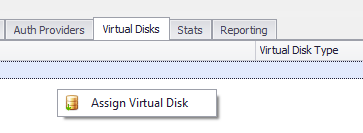
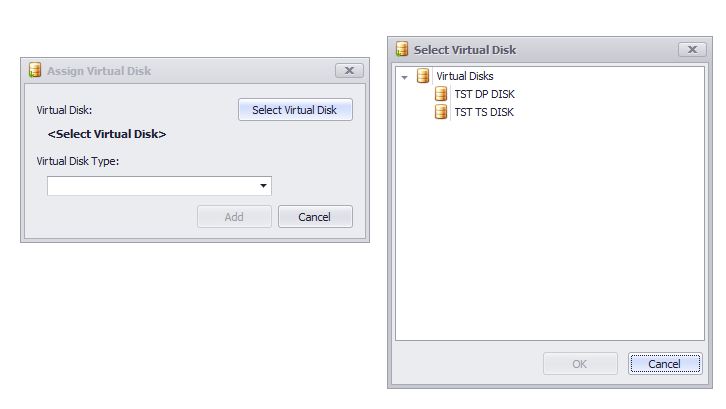
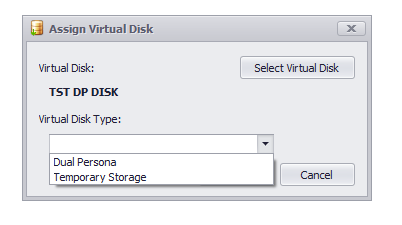
3. Assign to the folder where your devices are and select the type
Right-click Assign Virtual Disk
Select the Disk and select the Type
4. Lastly, we need to enable Temporary Storage in your profile.
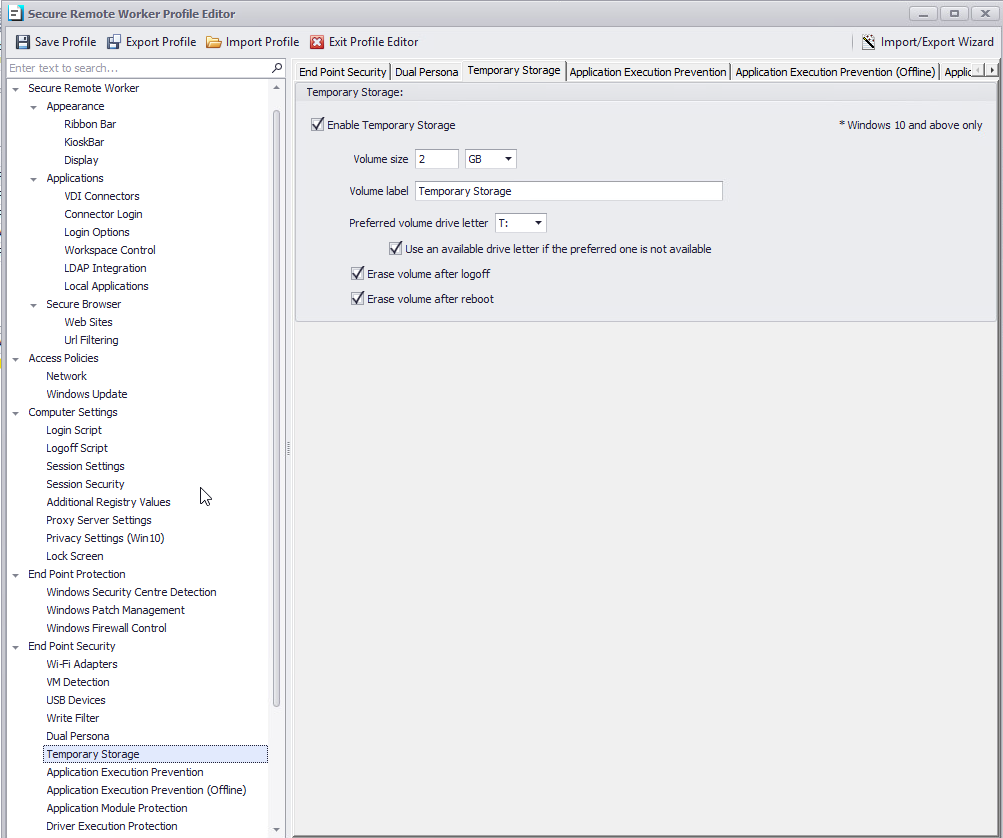
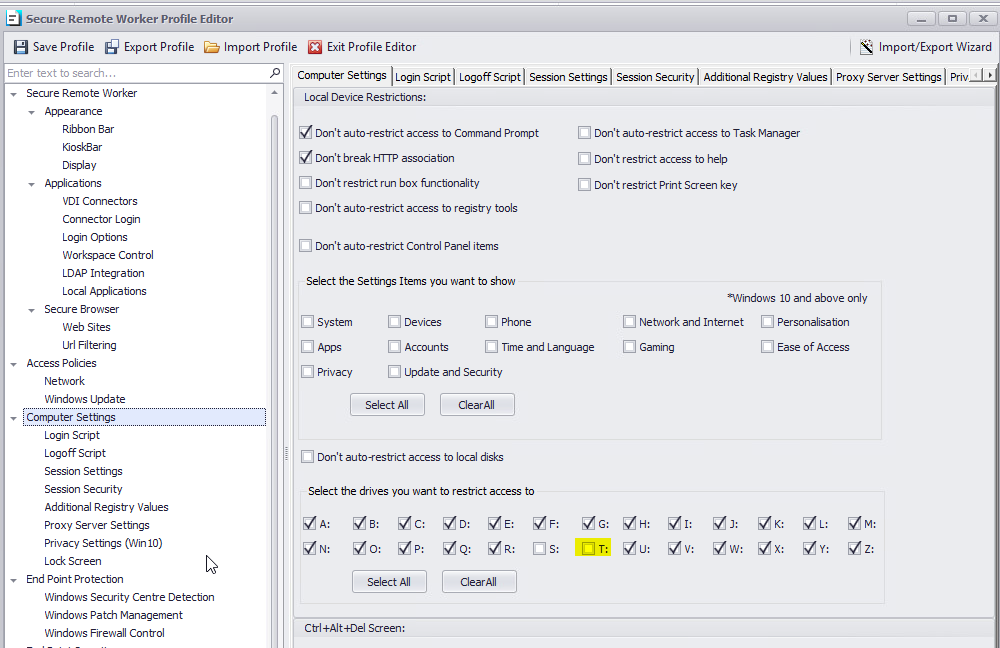
Be sure the drive letter you chose (e.g. T: in the example above) is not being restricted under Computer Settings:
Note: Virtual Disks cannot be created on a Home Edition OS even when the Console is opened as an administrator
For Dual Persona, the virtual disk process is similar and you can read more about it here:
https://kb.thinscale.com/secure-remote-worker-knowledge-base/setting-up-dual-persona
For v8 Cloud Deployments
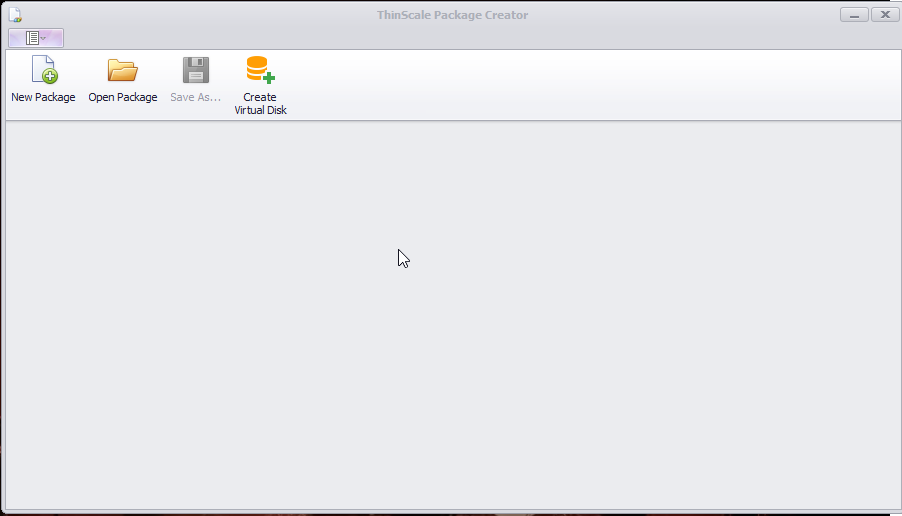
- First in order to create Virtual Disks, you'll need to download and install our Package Creator which is used both for packaging software and for the creation of disks.
Note: Since it utilizes Bitlocker, you'll both need to be able to run the Package Creator as admin, and also it needs to be launched from a Windows OS other than Windows Home editions since that does not include the full functions of Bitlocker.
- After installing and launching as admin, select “Create Virtual Disk” button
3. In this case I'm making a disk for use of our recommended security feature Dual Persona. (It can also be used for Temporary Storage disks). Select your intended size and give it a label. You also have the choice to define a custom unlock password if needed: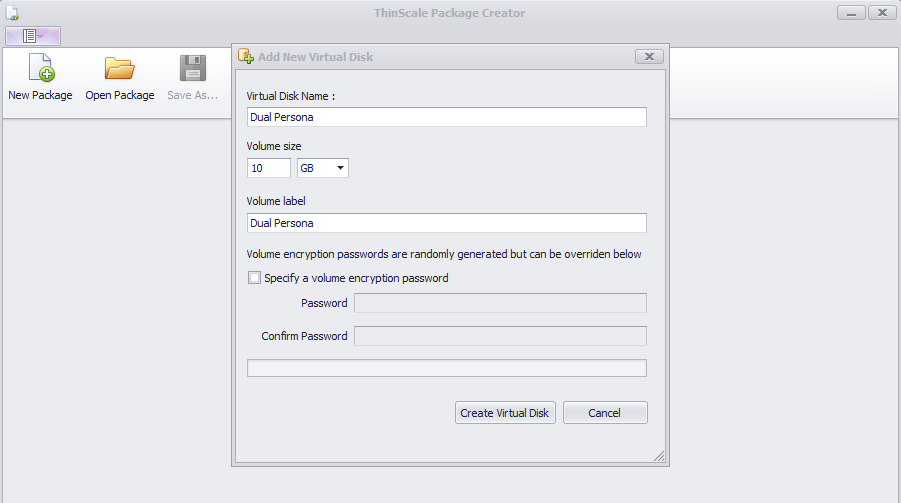
4. Then it will prompt you to save your virtual disk, which will be .vd extension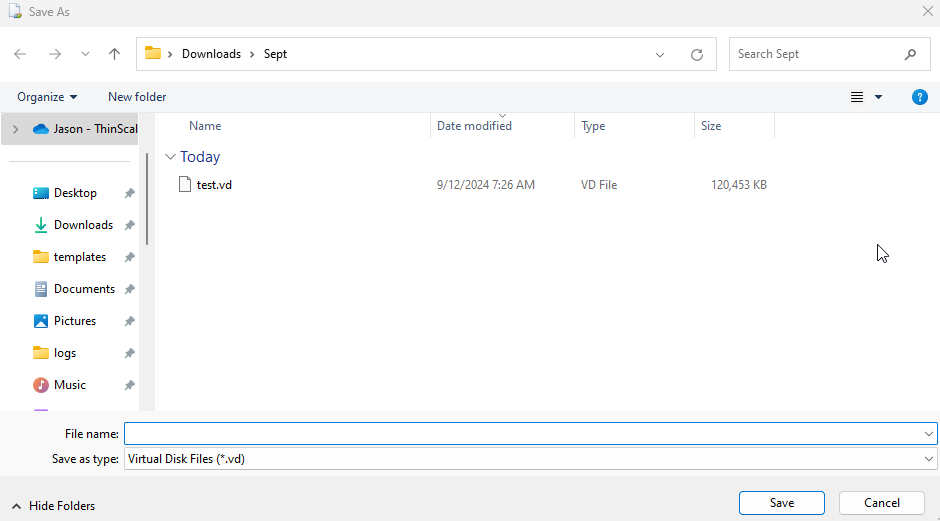
5. Now your disk is ready to deploy to your Device Portal. In your Device Portal, go to your Virtual Disks section and hit “Add” and then hit “choose file” and select your .vd for upload. Be sure you are deploying to your intended Resource Folder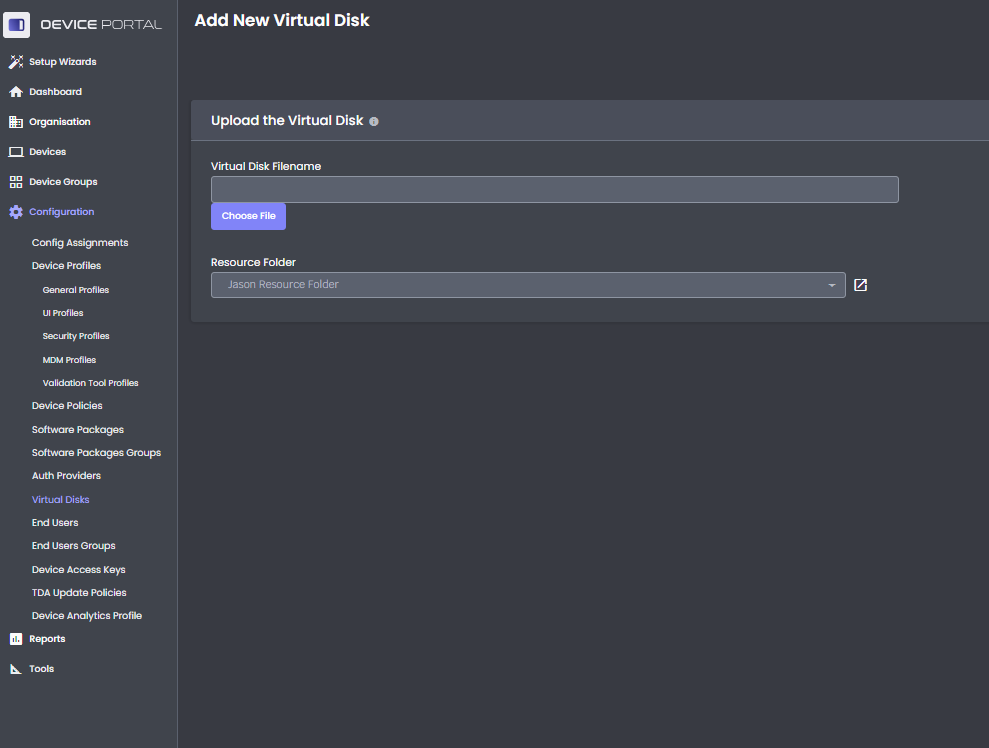
6. Once it finishes processing, please click “Verify Package” to ensure it gives the success message.
Please be sure to choose the intended use for this disk (I am using Dual Persona in this case).
Then hit Save at the top right corner after the green success message briefly displays.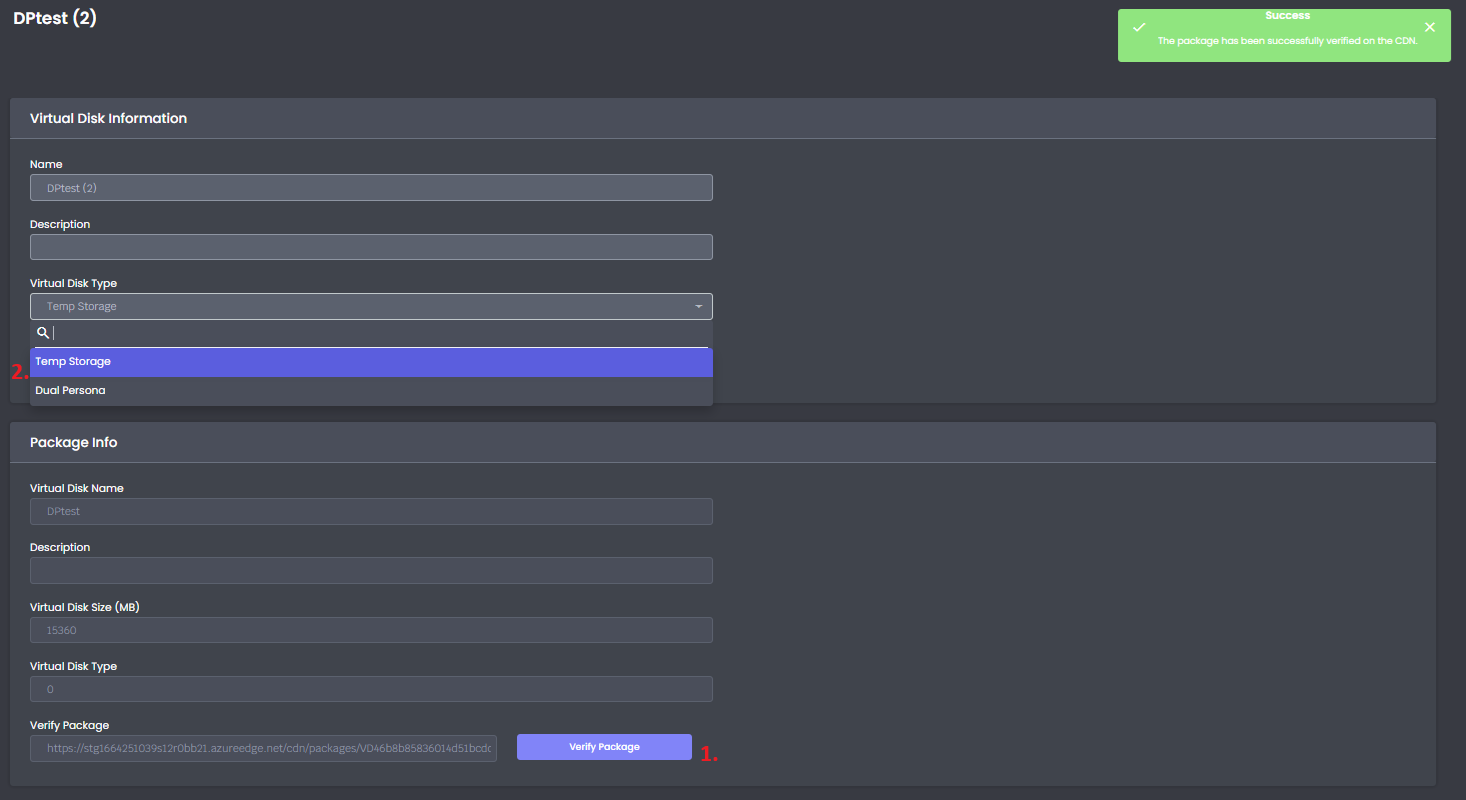
7. Now the disk is present in the Cloud, but not actively being deployed yet. Go to your Device Group for your intended deployment, and at the Virtual Disk section at the bottom, hit “Select Virtual Disks”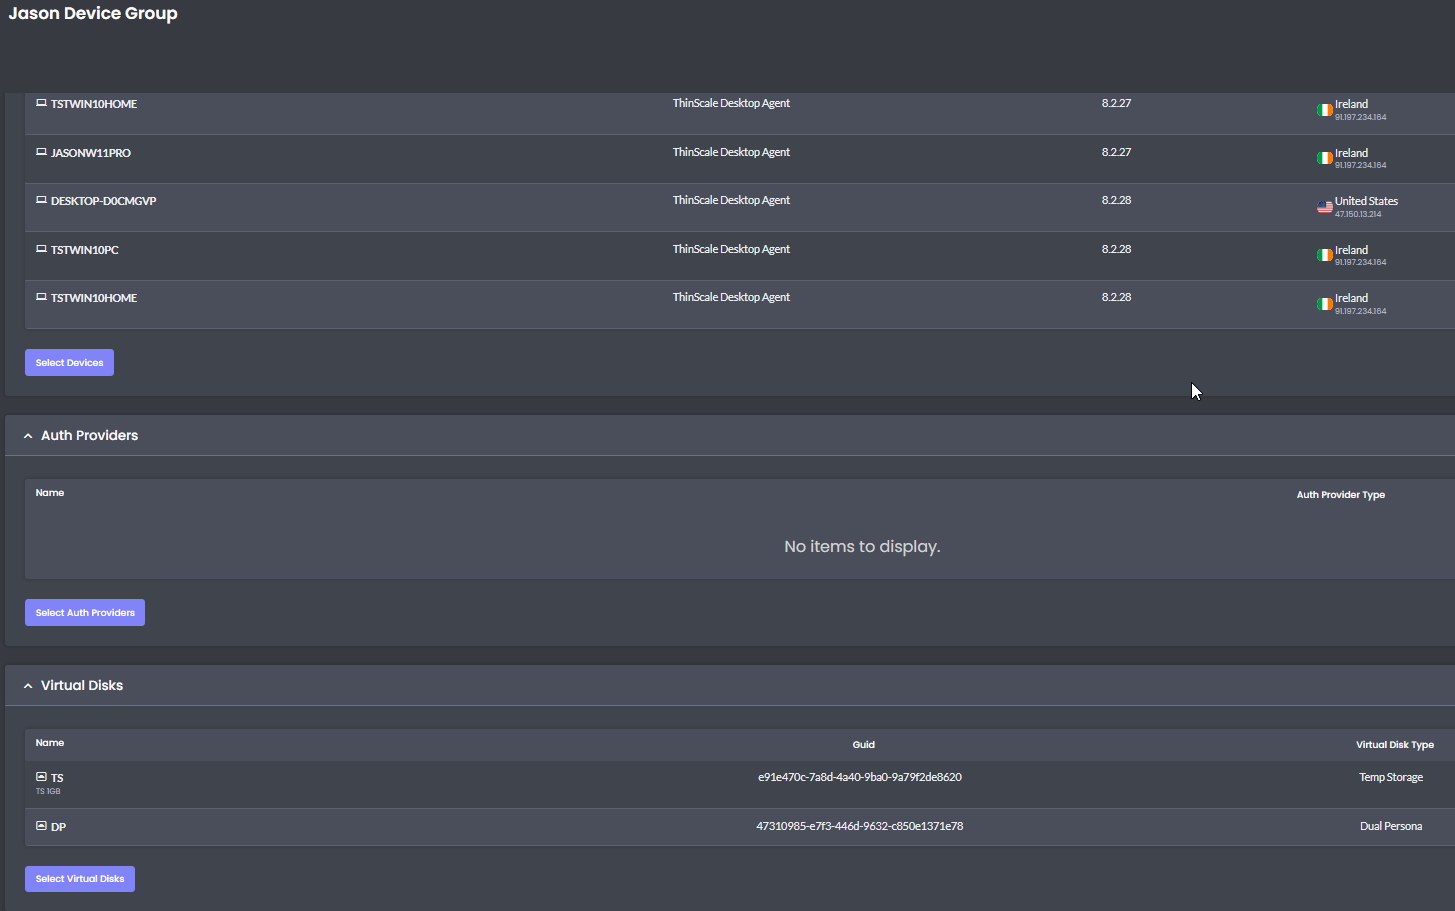
8. Check the boxes to include the disk(s), and hit Save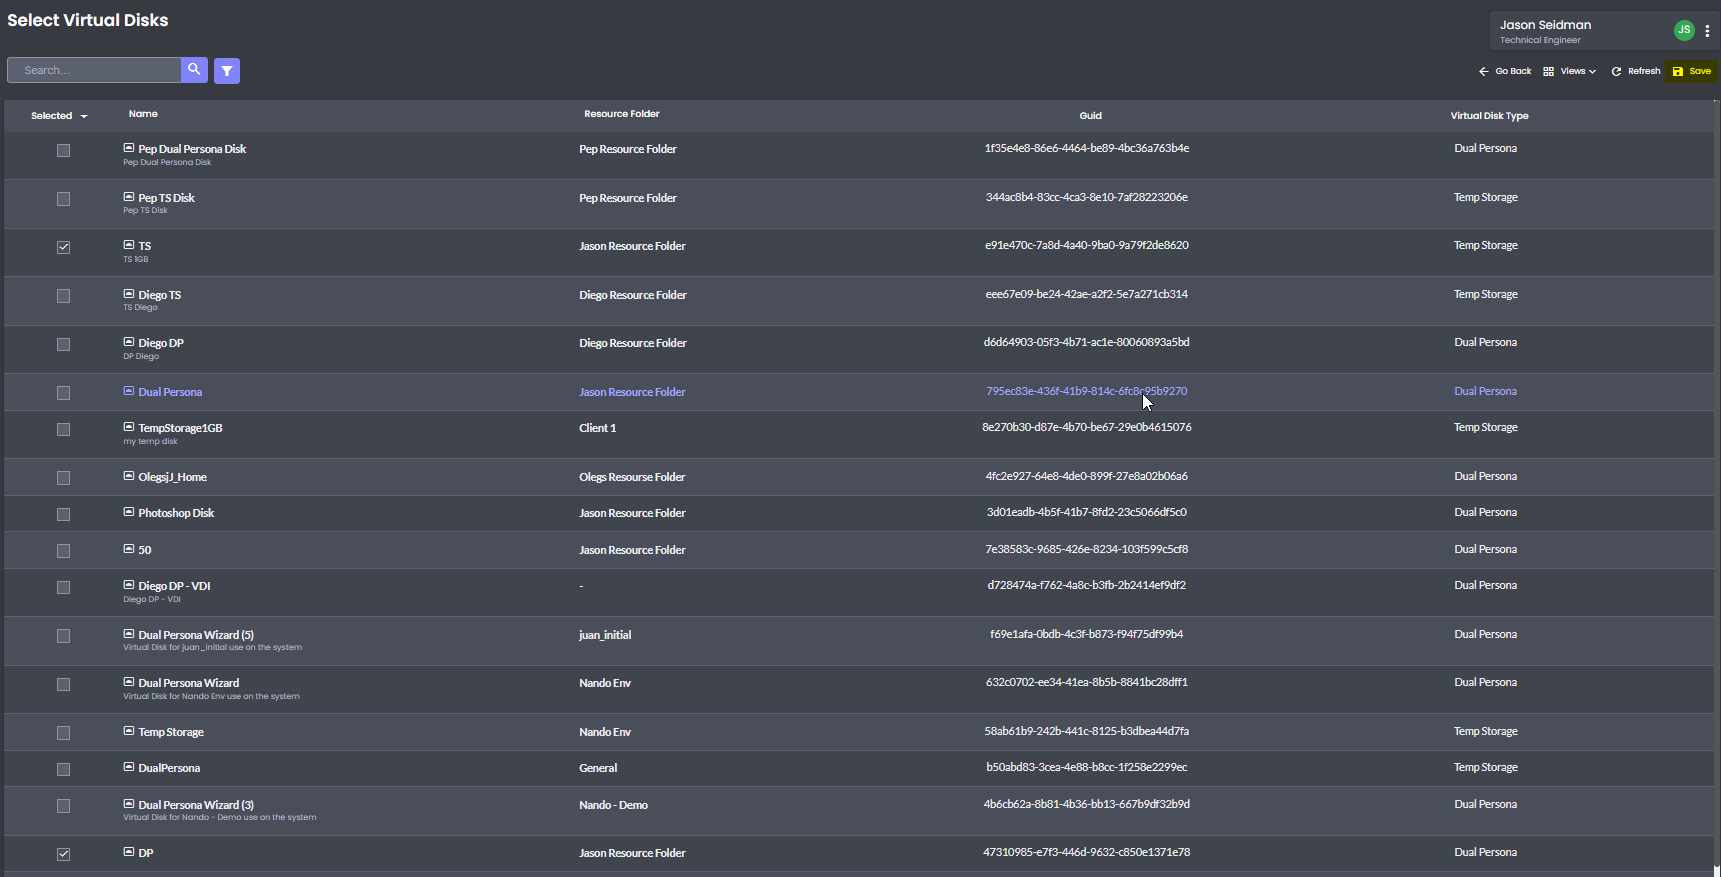
9. Lastly, please go to your Security Profile for your deployment, to the Dual Persona Section and enable and match your disk size and label. Then hit Save.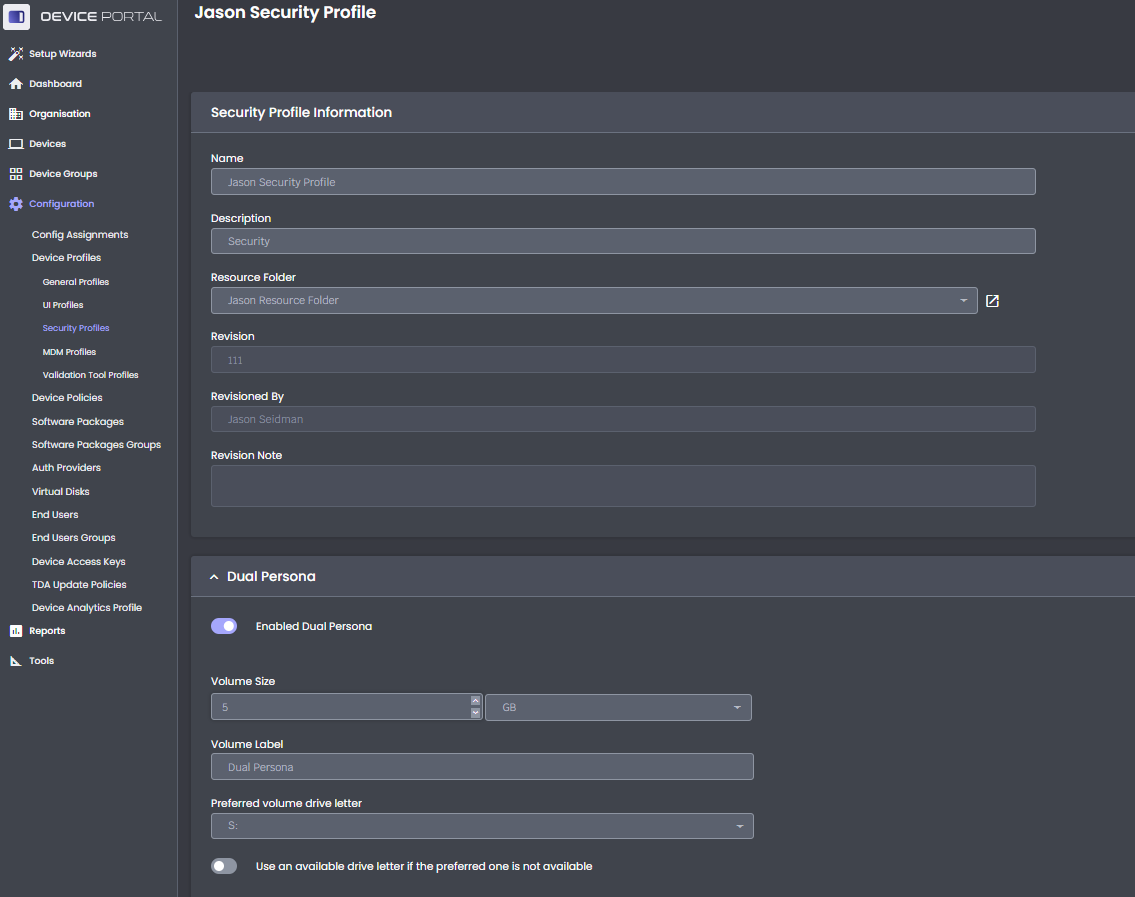
The next time a user launches into their session, they should get the deployment.
Please note if you are replacing an existing drive, either for Dual Persona or Temporary Storage, you would need to first have them back up any data they were using there if it's still needed, and then delete the disk which is on their machine under C:\ProgramData\TDA\Disks
Related helpful resources: